
This skirt has been one of the most fun skirts I have ever made. And it is definitely an eye catcher! I made it to go along with my special Ankara “Burset” top. I am looking forward to styling both of them in different ways.

I don’t know why I waited this long to make a tulle skirt. I guess it’s because of the inordinate about of tulle I thought I needed. But I found an easy way to make a full tulle skirt with only 6 meters of tulle! Can you believe it? In this easy step-by-step tutorial, I’ll show you how to create your own tulle skirt, with lots of photos and tips & tricks on how to create a full tulle skirt.
Supplies:
6 meters of flexible tulle
3 meters of taffeta for lining
3 meters of crinoline/horsehair, elastic – enough when stretched it comfortably fits around waist, scissors, measuring tape, pins, sewing machine
Before we get started, let me tell you the secret on how to get a full tulle skirt without a lot of tulle. First is the choice of tulle. Do not use soft tulle!!! Also do not use hard net or tulle!!! The trick is to find the perfect blend between soft and hard tulle, soft enough but still has structure to stand on it’s own. Next is the lining; you need a lining fabric that also has structure. Taffeta was the perfect choice for me. Let me know if you know any other fabrics similar to taffeta. In addition, you need to use crinoline to hem the lining to make it flare out and stand out more. The final tip is to gather the tulle fabric in a rectangle and not a half circle!
Great! now that we have the basics covered, let’s move on to the easy part of sewing the skirt.
HOW TO SEW A TULLE SKIRT
- My tulle was 60” wide, so I folded it in half to get a skirt length of 30”. Fold your tulle in half lengthwise (if your final number is 27 or less – otherwise you’ll skip the folding).

3. I cut the lining as a half circle skirt. Fold the fabric in half so you have 2 layers and 1 folded edge. Then measure the fullest part of your hips (the skirt opening has to be big enough to go over your hips when you put it on), and divide that number by 3.14. Take that resulting number and divide by 2. So, for example, if the widest part of your hips measured 40, the equation would be 40 ÷ 3.14 = 12.73, and then 12.73 ÷ 2 = 6.36. That number would be your hip measurement number for your pattern (just round up to the nearest 1/4″ of an inch to make it easier).
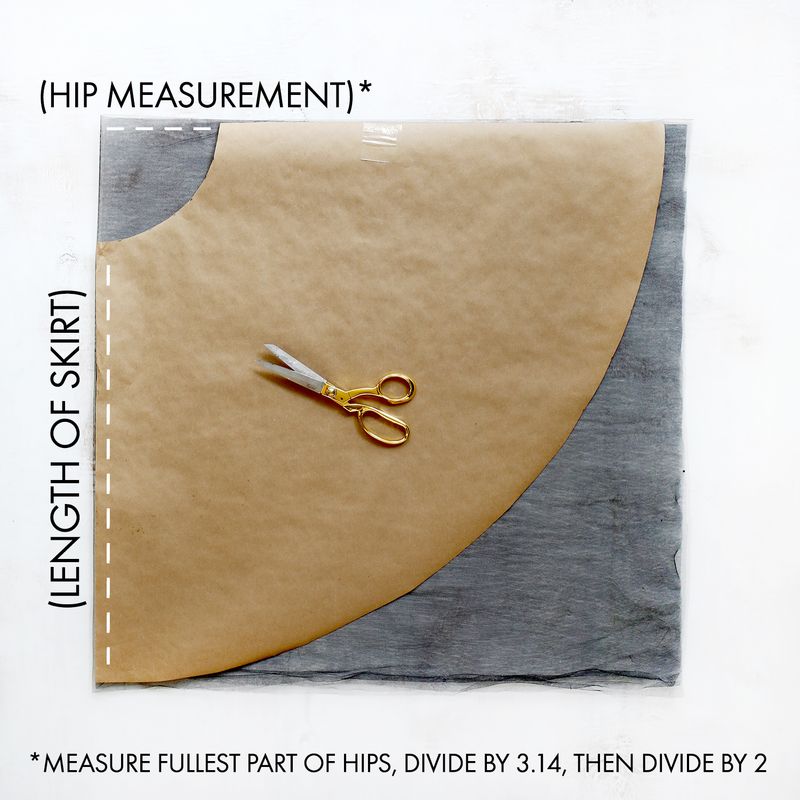

4. To cut out the fabric, mark the radius starting from one tip of the fabric. Just keep pivoting the ruler to make lots of marks and connect the dots at the end to get your rounded edge). Repeat the process from the same corner to the length of the skirt, but add the radius measurement to your total skirt length for that number (so if your length is 22″ and your radius measurement is 6.5″, then measure out 28.5″).
5. Take to the sewing machine and close up the open side.

6. Place the tulle and lining together and pin at the waist. then take to the sewing machine to join them together. You can use a loose basting stitch for this
7. To make your waistband, pin the elastic around your natural waist so that it feels snug but not too tight. Wiggle out of the elastic and sew it together at that point. Trim the ends to 1/2″ long, fold the ends down, pin in place, and sew those down to flatten them. Mark with pins the four quarters so you can match it with the tulle.

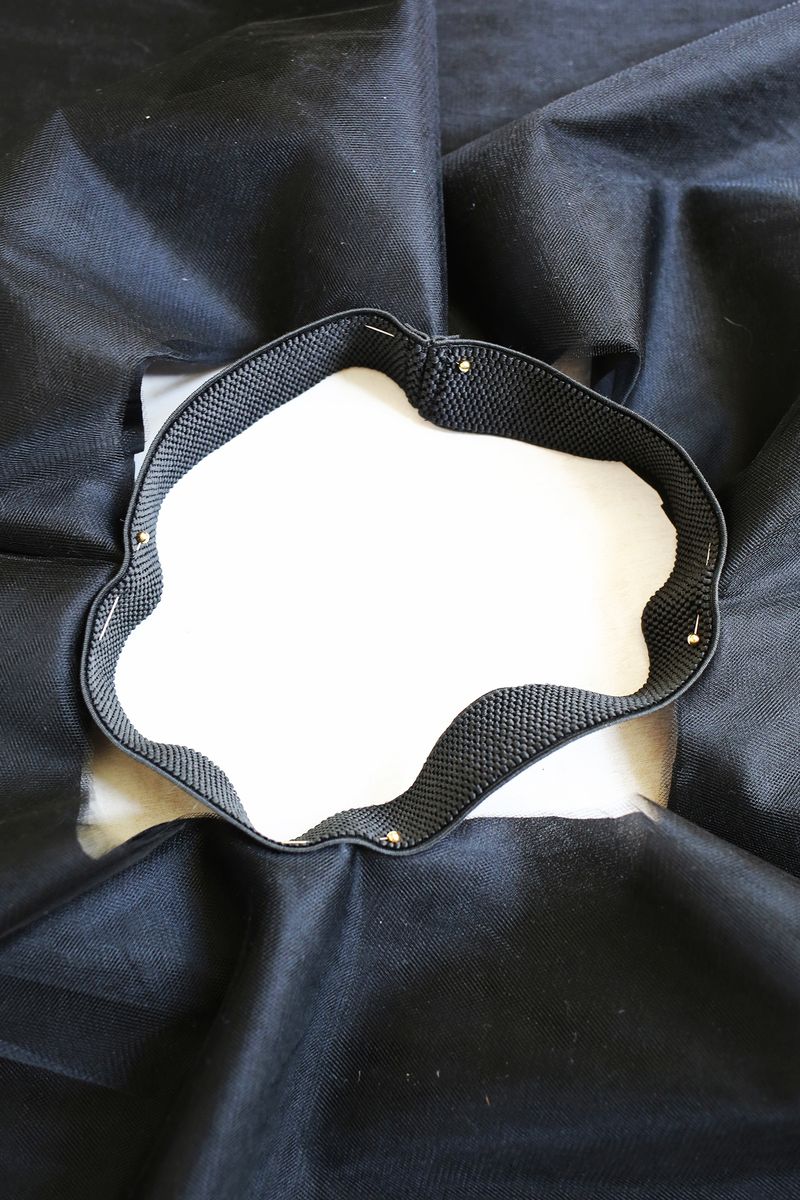
8. Use marking chalk to mark 4 equal sections on the waistline of your tulle circle. Do the same with the inside edge of your waistband. Use the marks to line up your waistband with your fabric and pin with 4 straight pins at each mark (you’ll pin the bottom inside edge of the waistband onto the top of the fabric layers.
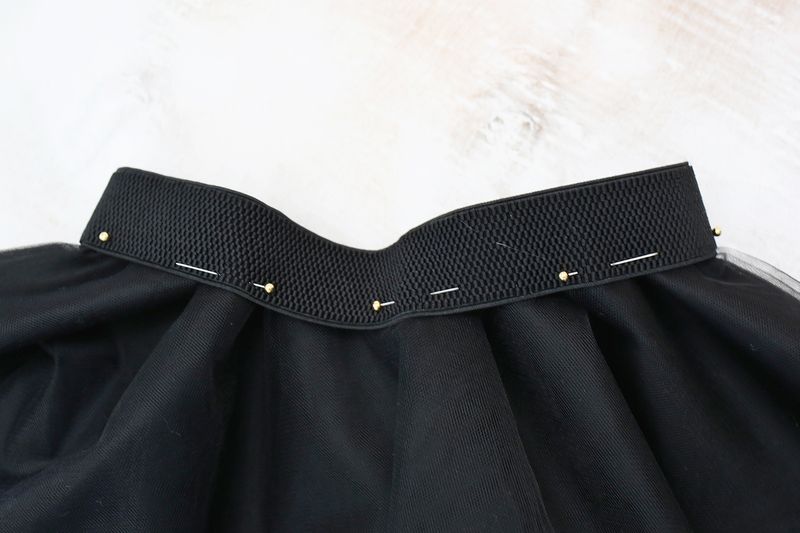
9. To sew your layers together, turn your skirt inside out and sew a few stitches near where a pin is holding the layers together. While the needle is in the down position, pull your elastic towards you until the fabric gap straightens out and sew along the waistband with a 1/2″ seam allowance on the fabric layers. Continue this process of pulling the elastic and the fabric straight and sewing until you get all the way around the waistband
And Voila! You have your very own tulle skirt. Wasn’t that easy? Watch the video below for a detailed tutorial.


Thanks for reading. Don’t forget to follow the blog and subscribe to the newsletter for more.

